
Organizing Base Items
Once a base has content, the work shifts to keeping items organized: tweaking text, moving items between bases, dropping what is outdated, and tracking processing. This page covers the day-to-day on the items screen.
Opening the items screen
Section titled “Opening the items screen”- In Admin → Knowledge Bases, click the row of the base you want to open.
- You land on the items screen for that base.
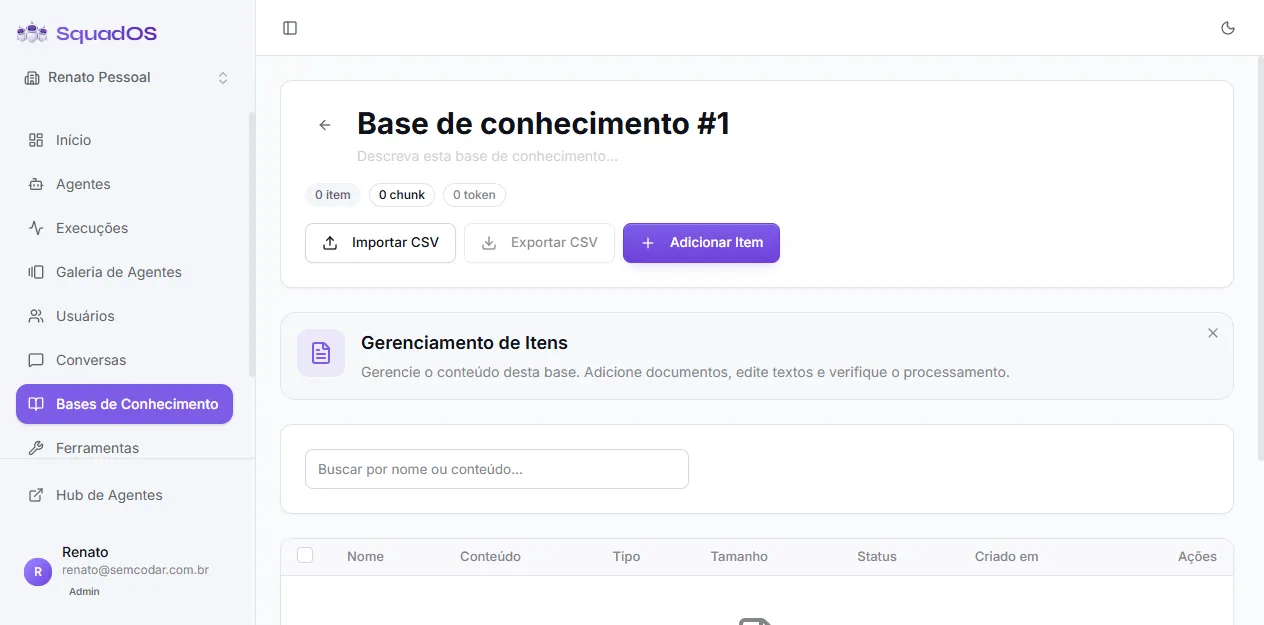
The top shows the base name and description — both editable inline (click to edit, blur or Enter to save). Below them, three indicators: total items, total chunks, and total tokens. These give you a quick sense of the base’s size.
The action bar has Import CSV, Export CSV, and + Add Item.
Search
Section titled “Search”The Search by name or content field filters items locally. It works well for bases with hundreds of items. There is no status filter — every item shows up together.
Processing status
Section titled “Processing status”Every item has a status that tells you where it is in indexing:
- Pending — created and queued, waiting for processing.
- Processing — content is being split into chunks and indexed; a progress bar shows the percentage.
- Processed — indexed and ready to be retrieved by the agent.
- Error — something failed (invalid file, content too large, etc.). Edit the item or delete and recreate it.
Only items in Processed are returned in agent search. Items in Pending or Processing are invisible until they finish.
When you edit a text item, it goes back to Pending and is reindexed automatically. Old chunks are removed before new ones are written, so there is no duplication.
View and edit
Section titled “View and edit”Each row has actions:
- View (eye icon) — opens a modal with the full item content, useful for reviewing without entering edit mode.
- Edit (pencil icon) — only appears for text items. You edit name and content in the full editor. Items coming from a file (PDF, CSV, etc.) are not editable from the UI; to change the content, delete and upload again.
- Delete (trash) — removes the item and its chunks. Asks for confirmation.
Adding items
Section titled “Adding items”The + Add Item button opens a screen with two tabs: Text Block and File. For batch uploads, use Import CSV at the top of the page. Details in Uploading Documents.
Bulk selection
Section titled “Bulk selection”Check several items using the left column checkboxes. A bar with {N} selected appears unlocking two actions:
- Move Selected — switches the selected items to another base.
- Delete Selected — removes all at once (asks for confirmation).
Moving items between bases
Section titled “Moving items between bases”Use Move when you notice an item is in the wrong base (for example, a Support item that should be in Sales).
- Select items with the checkbox.
- Click Move Selected in the action bar.
- Pick the destination base from the list.
- Confirm.
SquadOS updates both the item record and the indexed vectors, so agent search reflects the new base immediately, without reprocessing.
Constraint: the destination base must belong to the same organization.
Export CSV
Section titled “Export CSV”The Export CSV button downloads a file with the title and content of each text item in the base. Useful for backup, spreadsheet editing, or migrating between bases. Items coming from files without extractable text are skipped — the confirmation modal tells you how many items will be exported and how many will be ignored.
Organization best practices
Section titled “Organization best practices”- One base per domain. Mixing support, sales, and legal in a single base muddies search. Prefer lean bases with a clear scope.
- Descriptive titles. The agent does not use the title in search, but you do when you need to find an item to edit. Generic titles like “Document 1” are a future problem.
- Item size. Very large texts become many chunks and fragment context. When an item spans several pages, consider splitting by subtopic.
- Review error items. Error status does not clear on its own. Edit the content or redo the upload.
- Clean up what aged out. Repealed policies, outdated FAQs, processes that changed: better to delete than let the agent cite the wrong content.
- Watch AutoLearn. The AutoLearn tab (at the top of the base list) shows what the agent could not answer — it is the best signal of what is missing from the base. See Learning Opportunities.