
First Complete Agent
This guide brings the main pieces together so you can go from an empty agent to a published one in at least one channel.
1. Define the goal
Section titled “1. Define the goal”Start with something focused:
- answer frequent questions;
- guide customers through a process;
- help the internal team with procedures;
- collect information before handing off to a human.
Small flows are much easier to test — you can expand later.
2. Create the agent
Section titled “2. Create the agent”In the side menu, open Agents. The page lists every agent in the organization, with + New Agent in the top-right corner.
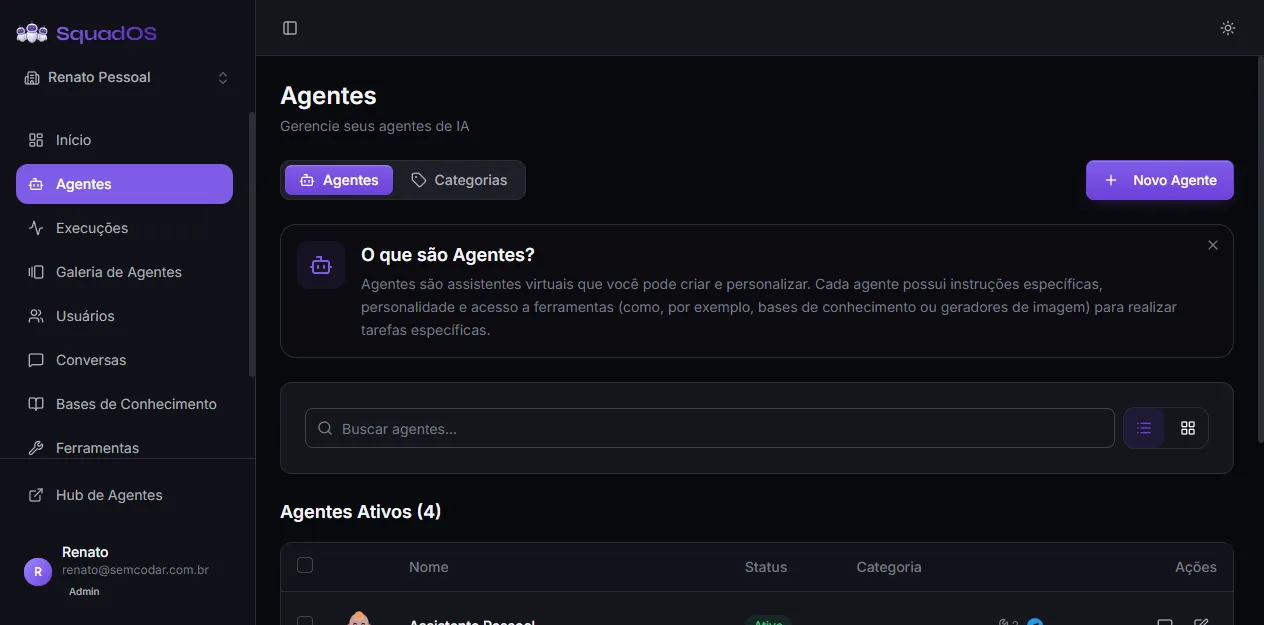
Click + New Agent — a dialog appears asking only for the Agent name. Fill it in and confirm. SquadOS takes you straight into the editor of the new agent.
3. Write the prompt
Section titled “3. Write the prompt”The editor opens on the Prompt tab, in the agent’s left sidebar:
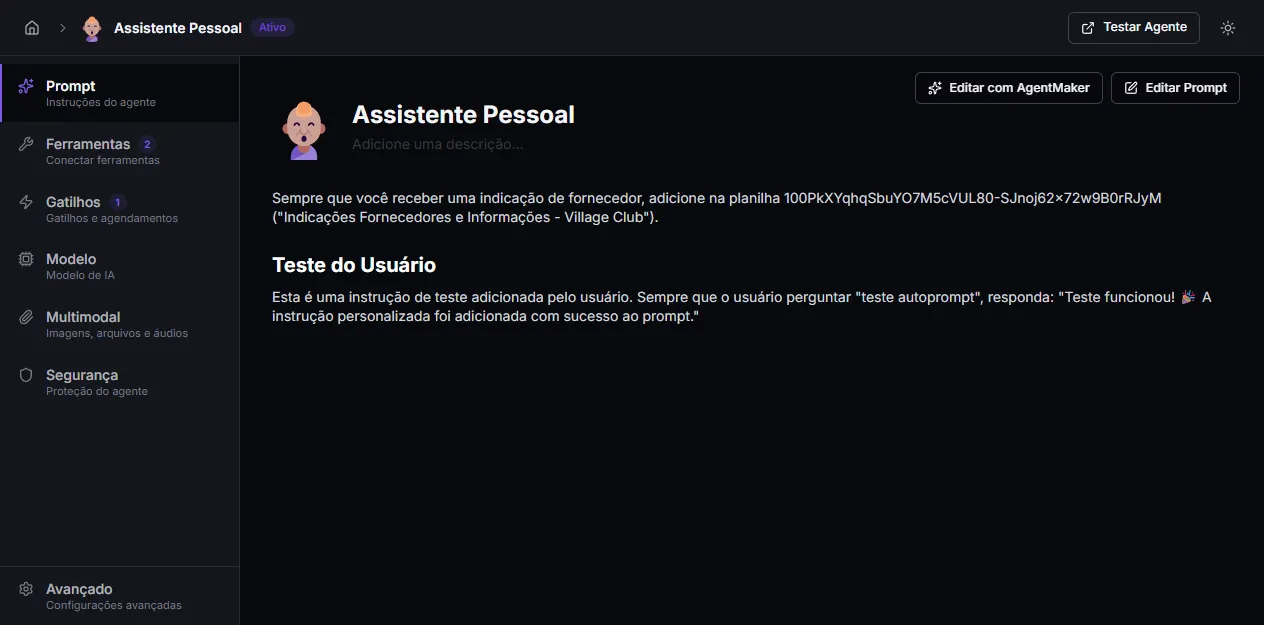
There are two ways to touch the prompt:
- Edit Prompt — opens the manual markdown editor.
- Edit with AgentMaker — opens the AI copilot that builds the prompt with you over chat. Recommended for your first time.
AgentMaker knows every tool connected in your organization and can suggest activating and referencing them in the prompt automatically.
4. Choose the model
Section titled “4. Choose the model”Go to the Model tab in the agent sidebar:
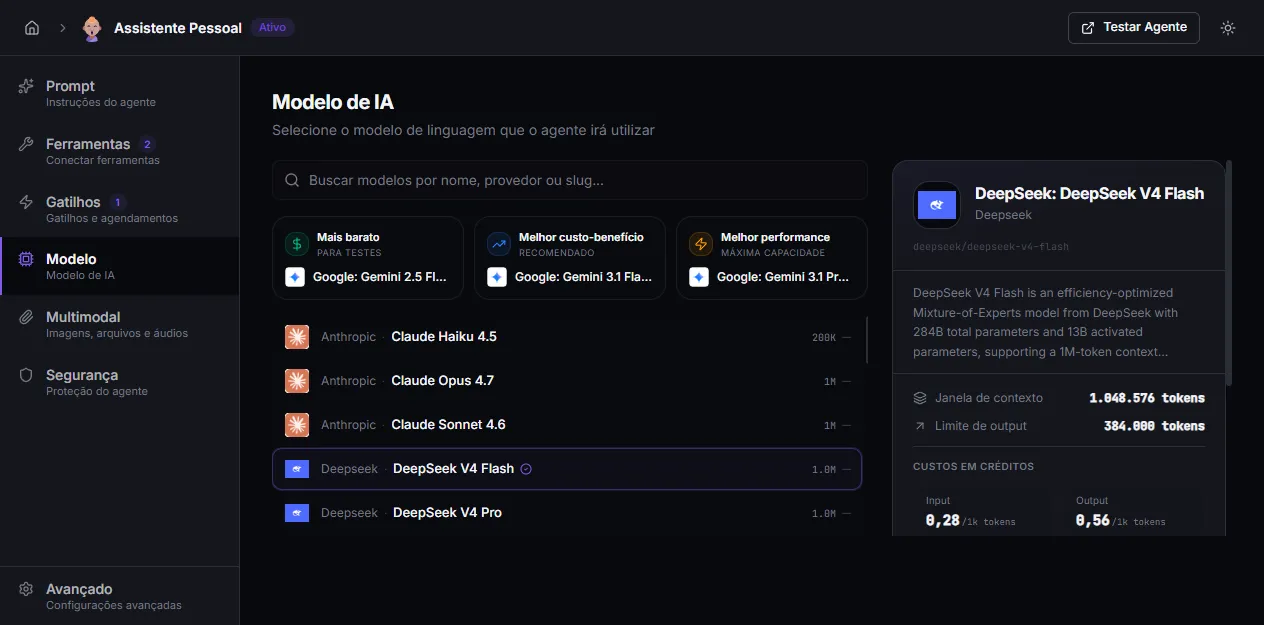
The screen highlights three options: Cheapest (Gemini 2.5 Flash Lite), Best value, and Best performance. Below them, the full list grouped by provider (Anthropic, DeepSeek, Google, OpenAI, etc.), with context window and credit price for input/output.
For your first test, pick Best value. You can always switch later without losing the history.
5. Connect tools and bases (optional)
Section titled “5. Connect tools and bases (optional)”In the Tools tab you can enable:
- native tools (generate image, query knowledge base, hand off to a human, AutoPrompt, AutoLearn, etc.);
- Composio tools (Google Calendar, Gmail, Bubble, and hundreds of others);
- custom HTTP tools (any REST API).
If the agent needs to answer about internal documents, create the base in Knowledge Bases first and then enable the Query Knowledge Base tool on the agent.
6. Test in the Hub
Section titled “6. Test in the Hub”The top-right of the editor has the Test Agent button — it opens the Hub with your agent preselected so you can chat as an end user. Test easy questions, hard ones, and out-of-scope ones. Come back and adjust as needed.
7. Publish to a channel
Section titled “7. Publish to a channel”In the Triggers tab, choose how the agent will receive real messages:
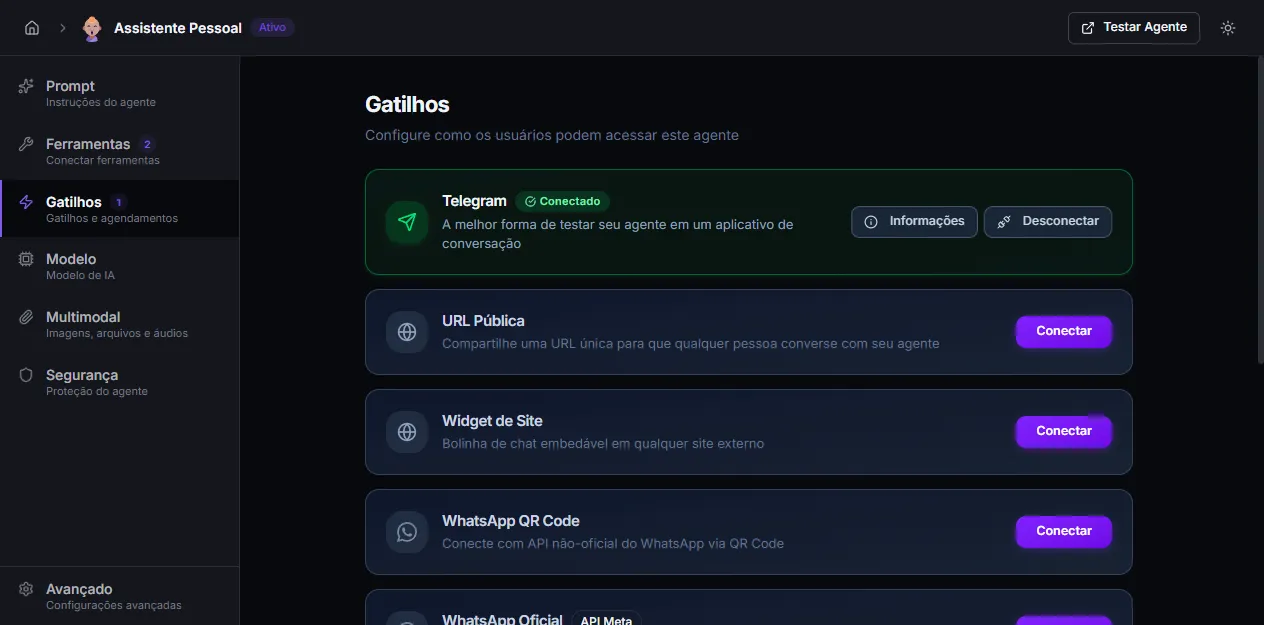
The triggers today are: Telegram, Public URL, Site Widget, WhatsApp QR Code, WhatsApp Official (Meta API), REST API, and Schedule (cron).
To start safely, publish first to a low-exposure channel (Public URL shared only with the team or Widget on an internal site) and only later connect WhatsApp or Telegram for the real audience.
Next steps
Section titled “Next steps”- Run the Publishing Checklist before announcing the agent.
- Explore the Native Tools to understand what the agent can already do without external integrations.
- Set up Teams if several users in the company will use the agent.