
Custom HTTP Tools
Custom HTTP tools let your agents call any REST API — n8n / Make webhooks, CRMs, internal services, Slack bots, etc. You configure the endpoint once at the organization level and then connect the tool to the agents that need it.
Where to create
Section titled “Where to create”Custom HTTP tools are created in the admin panel under Tools → Active → New Custom Tool.
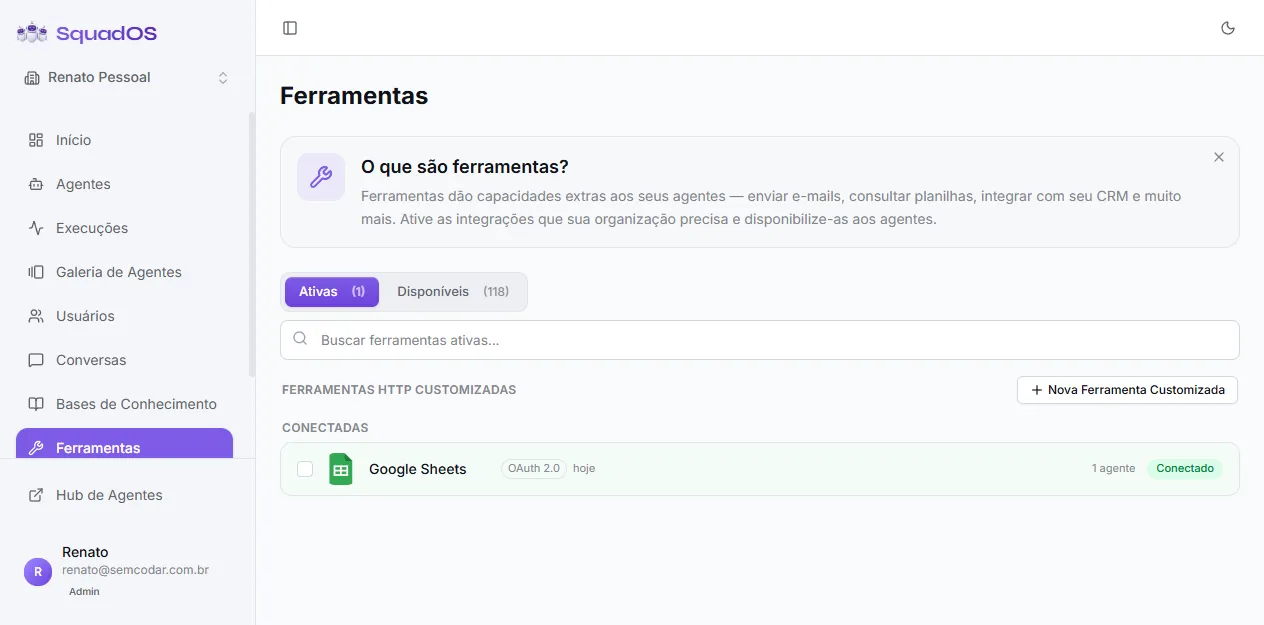
Once created, the tool appears under Other Tools when you click + Add Tool in any agent in the organization.
The form
Section titled “The form”Clicking + New Custom Tool opens the Create HTTP tool modal.
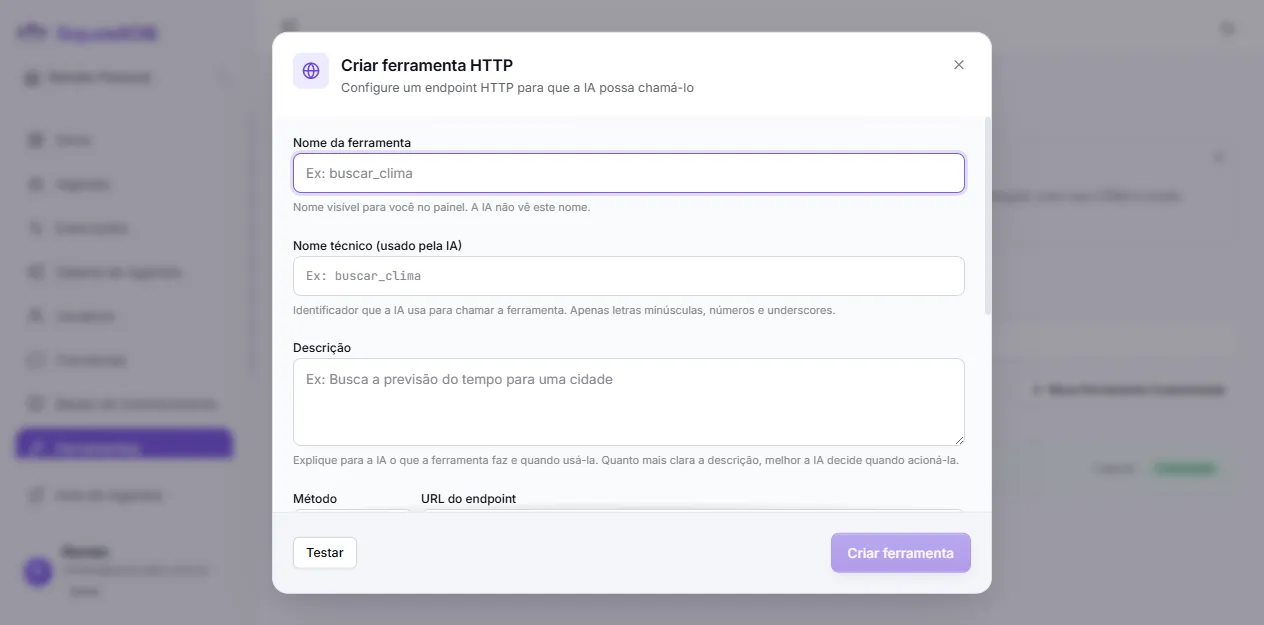
Identification
Section titled “Identification”| Field | What to fill in |
|---|---|
| Tool name | Friendly name only for you, shown in the panel. The AI doesn’t see this. Ex.: Assign Human CRM. |
| Technical name (used by AI) | Identifier the AI uses to call the tool. Only lowercase letters, numbers, and underscores. Ex.: assign_human_crm. |
| Description | The most important field. Explain what the tool does and when to use it. The AI decides to call the tool based on this text. Ex.: Use when human attendance is needed for issues the AI cannot clarify. |
Method and URL
Section titled “Method and URL”- HTTP method:
GET,POST,PUT,PATCH, orDELETE. The JSON Body field only appears when the method isn’tGET. - Endpoint URL: full URL. You can use
:keyto mark path parameters (e.g.,https://api.example.com/users/:id) — these are configured in the Path parameters section below.
Authentication
Section titled “Authentication”How SquadOS authenticates with the API. The secret is stored encrypted on the server and the AI never has access to it.
| Type | How it works |
|---|---|
| None | Public endpoint, no authentication. |
| Bearer Token | Sends Authorization: Bearer YOUR_TOKEN. |
| API Key (Header) | Sends a custom header (e.g., X-API-Key: YOUR_TOKEN). |
| Custom Header | Like API Key, but lets you add a prefix to the value (e.g., Authorization: Token YOUR_TOKEN). |
When editing an existing tool, the secret field appears empty with •••••••• (keep current) placeholder. Leave blank to preserve the current value — only fill in if you want to replace it.
Key concept: Parameters vs. JSON Body
Section titled “Key concept: Parameters vs. JSON Body”| Field | Role |
|---|---|
| Parameters | Defines what the AI can send when calling the tool. Becomes the “contract” the model sees. |
| JSON Body | Defines how those values are packed into the HTTP request body. |
Practical example
Section titled “Practical example”Tool that notifies a human attendant via webhook.
Parameters (what the AI sends):
{ "type": "object", "properties": { "text": { "type": "string", "description": "Summary of the customer's problem" } }, "required": ["text"]}JSON Body (sent to the endpoint):
{"message": "{{text}}", "channel": "web", "priority": "high"}When the agent calls with text: "Customer cannot access", SquadOS sends:
{"message": "Customer cannot access", "channel": "web", "priority": "high"}channel and priority are fixed; {{text}} was replaced with the AI value.
Parameters
Section titled “Parameters”The contract describing for the AI which arguments it can/must send. Two edit modes:
- Builder: visual interface with
name / type / description / requiredrows. Ideal for simple cases. - JSON Schema: paste a complete JSON Schema. Useful for complex types (enums, nested objects, typed arrays).
Each parameter:
- Becomes a
{{placeholder}}available in the JSON Body. - Is described to the AI — clear descriptions improve precision.
- Can be marked
requiredto force the AI to provide it.
Advanced settings (optional)
Section titled “Advanced settings (optional)”Expand the collapsible sections at the bottom of the form:
Custom headers
Section titled “Custom headers”HTTP headers sent on every request, in addition to auth ones. Use for Content-Type, Accept, X-Source, etc.
Path parameters
Section titled “Path parameters”Replace URL chunks marked with :key. Example: URL https://api.example.com/users/:id with path param id. Each path param has:
- Key: name of the placeholder in the URL (no
:). - Default value: fixed value to use if the AI doesn’t provide one.
- AI provides: if checked, the AI fills it at runtime. If unchecked, the default value is always used.
Query parameters
Section titled “Query parameters”Added to the URL as ?key=value. Same logic as path params.
- Timeout: max time (ms) SquadOS waits for response. Default: 30000ms (30s).
- Send conversation metadata: when checked, adds to the body fields like
conversation_id,agent_id,external_contact. Useful for webhooks needing to correlate with the conversation.
Testing the tool
Section titled “Testing the tool”Before saving, use the Test button at the bottom of the modal. It opens a panel that:
- Shows required parameters for you to fill manually.
- Runs the real request against the endpoint.
- Displays the full response (HTTP status + body).
The tool only gets a green indicator (configured) after a successful test.
Connecting to the agent
Section titled “Connecting to the agent”Once saved, the tool appears under Other Tools when you click + Add Tool in any agent:
- Open the agent under Agents → [your agent] → Tools.
- Click + Add Tool.
- Under OTHER TOOLS, pick the HTTP tool you just created.
- (Optional) Configure per-agent overrides if you want fixed values without changing the base tool.
The AI gets the tool available immediately in the next conversations.
Best practices
Section titled “Best practices”- Descriptions matter: the quality of tool and parameter descriptions is what most affects call accuracy. Be specific about when to use.
- Use
requiredfor parameters that are truly required. This forces the AI to ask the user if info is missing. - Test before connecting: a misconfigured endpoint in production generates errors in every conversation using the tool.
- Edit carefully: changing an organization tool affects immediately all agents using it.
- One purpose per tool: instead of a “super tool” with 20 parameters, prefer several specific ones. The AI picks better between specialized tools.